GUI – Design setup
Overview
These are settings that determine how the panel design will be performed. Users should understand the requirements of the probe manufacturer and choose settings that match them.
Choosing the viewpoint design
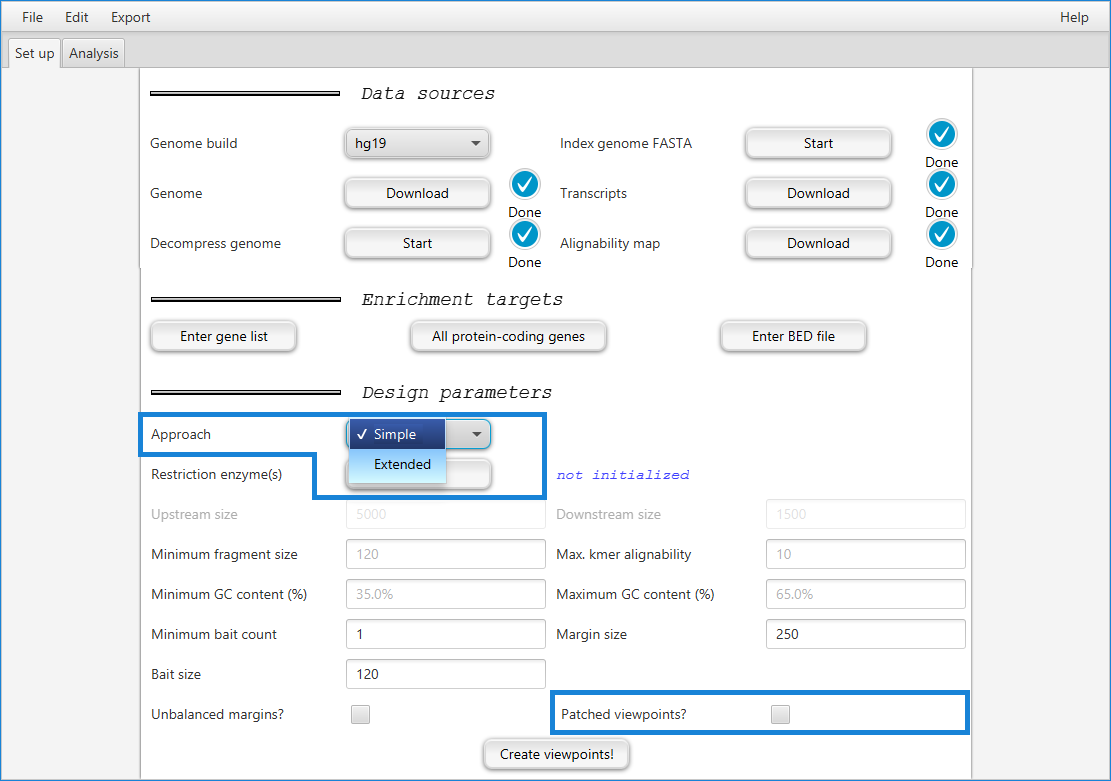
GOPHER implements three main strategies for probe design:

The simple approach generates probes that are similar to those used for many previously published capture Hi-C studies: One fragment is designed per target region (often a transcription start site of a protein-coding gene); GOPHER can generate probes using this probe set for all transcripts of all protein-coding genes or for a user-defined gene set.
The simple-patched approach “patches” viewpoints that are poorly covered by single fragments in a way that can increase the number of genes with valid viewpoints.
GOPHER additionally implements a new approach to probe design that we term extended approach which is intended to provide greater resolution than the simple approach by selecting sets of multiple fragments per target region.
In general, the simple approach is best suited for investigations of larger numbers of targets (such as a promoterome in which all promoters of all coding genes are investigated, and the extended approach is more suited to investigate a small sample of genes (e.g., 500–1000) involved in a biological process of interest.
For more information on the different approaches, see section “Approaches to viewpoint design” on page “Concepts and terminology”
Choosing restriction enzymes
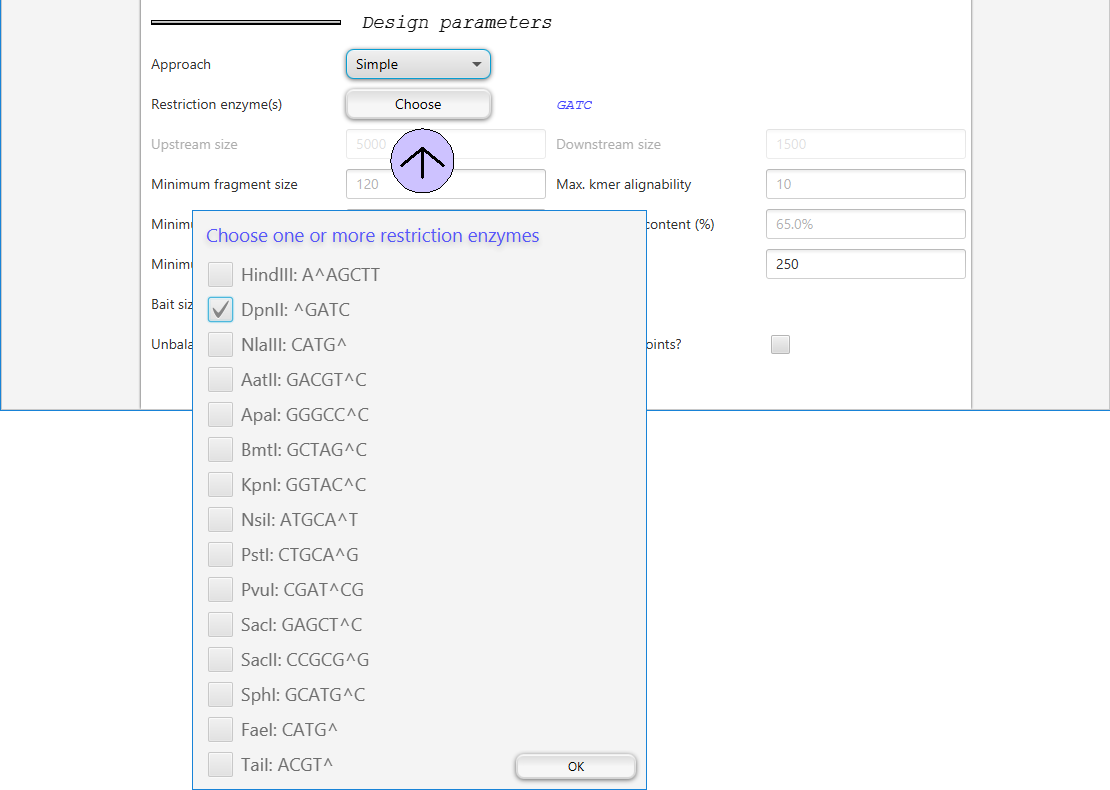
Clicking on the Choose button after Restriction enzyme(s) will open a dialog where the user can choose one or multipe restriction enzymes.
Obviously, you need to choose the enzymes that will be used in the captuyre Hi-C experiment.

Miscellaneous parmeters
There are various additional parameters that can be adjusted.

Parameter |
Explanation |
|---|---|
|
Number of base pairs upstream (5’) of TSS |
|
Number of base pairs downstream (3’) of TSS |
|
Size threshold for choosing a restriction fragment in base pairs |
|
??? |
|
Minimum percentage of G and C bases in fragment |
|
Maximum percentage of G and C bases in fragment |
|
??? |
Bait size
Bait size should be set according to the length that will be ordered from the manufacturer.
A typical value is 120 bp (this is the default in GOPHER).
Margin size
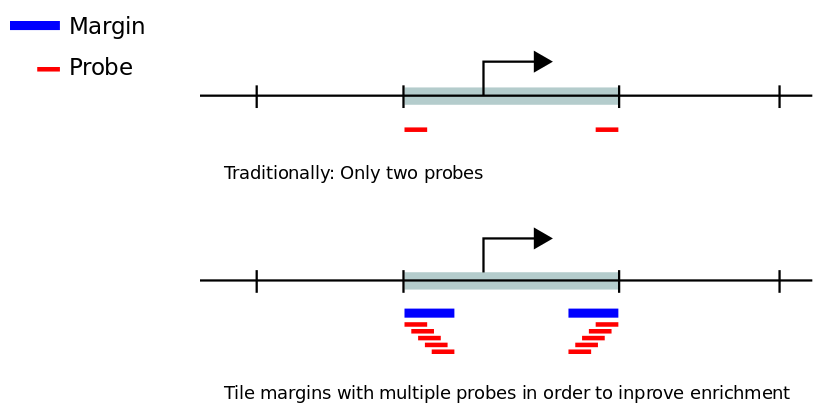
Margin size defines the width of the targeted regions at the outermost ends of restriction fragments that are earmarked to be tiled with probes.
Margin size refers to the average size of the edge (margin) of the restriction fragments that remain after the fragmentation (sonication) step of the Capture Hi-C protocol.
For instance, if a restriction fragment is 1000 bp long directly after restriction enzyme digestion, sonication may further fragment this segment of DNA into two or more smaller fragments, and the fragment that is attached to the biotin marker will be enriched. The baits are therefore typically designed to hybridize to the margins (and not to the center) of the restriction fragments.
The margin size parameter should thus be set according to the expected experimental fragmentation size. We have found that 250 bp is a good starting point, and this value is the default in GOPHER.

Unbalanced margins?
For some capture Hi-C design strategies, only two probes (or baits) are placed at the outermost ends of restriction fragments that are ought to be enriched. Enrichment and sequencing in capture Hi-C experiments effectively is concentrated in the margins of the fragments as defined above. Typcically, fragments whose margins have a too high repeat content or that have a too high or too low GC content are difficult to enrich and sequence and are therefore excluded from probe designs.
In many cases, however, one of the two ends of a fragment may satisfy repeat and GC criteria, while the other end does not.
GOPHER allows users to choose whether both ends of a fragment must satisfy these criteria (Unbalanced margins? unchecked), or whether all fragments are chosen for which at least one of the ends satisfies the criteria (Unbalanced margins? checked).
Creating viewpoints
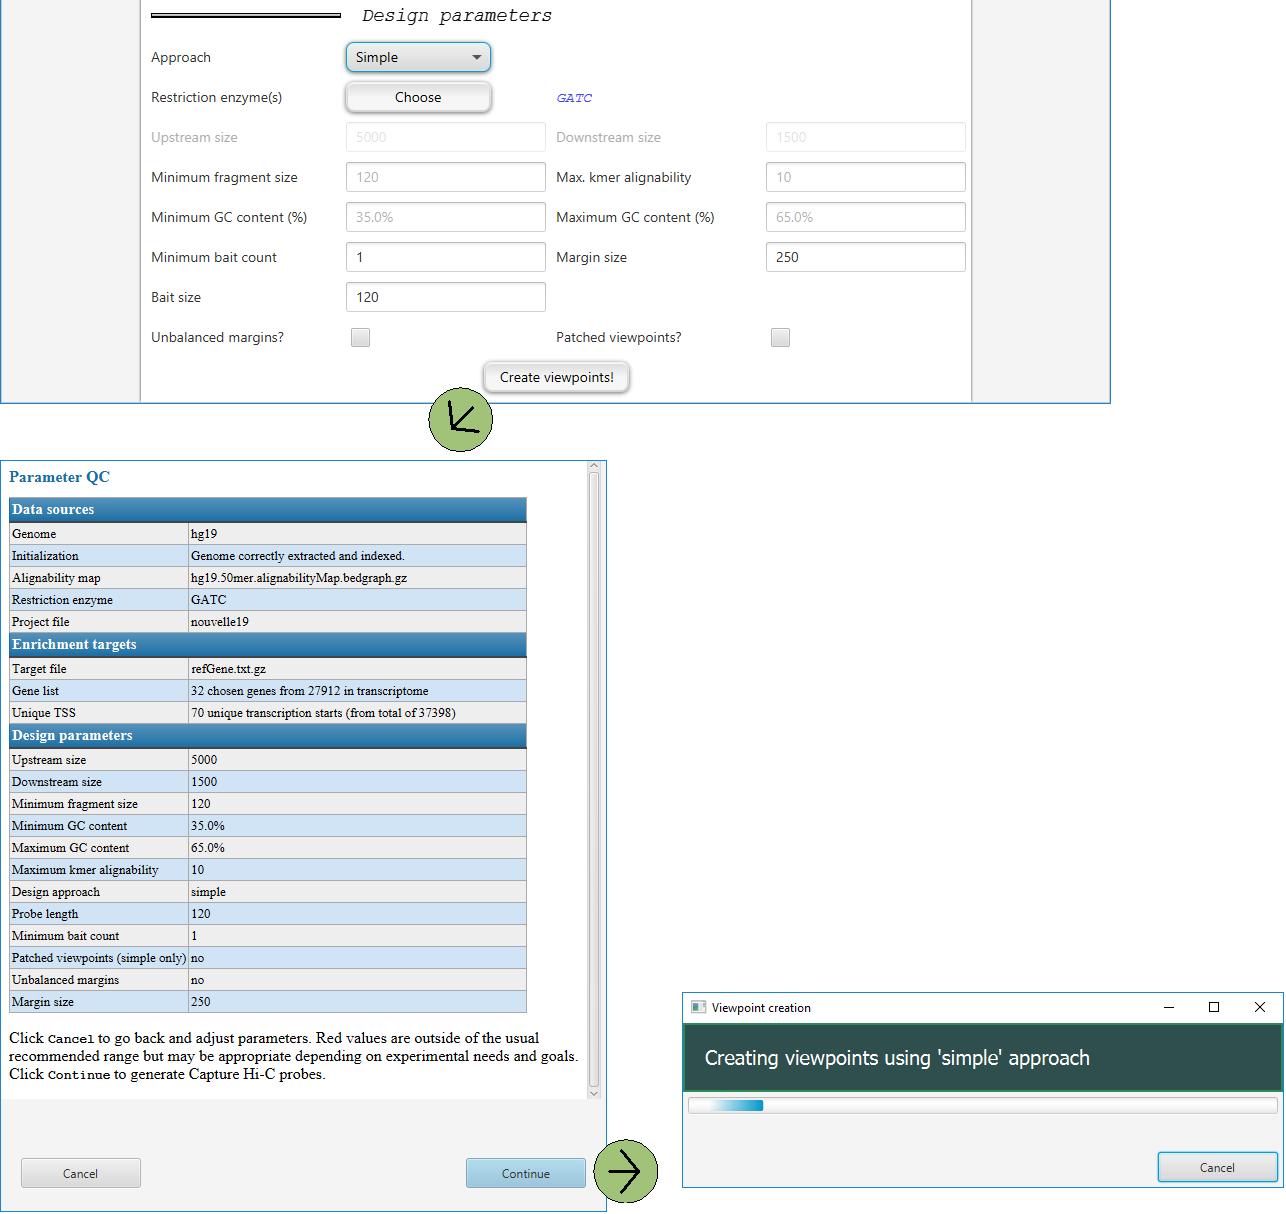
Clicking on Create viewpoints! will open a dialog in which the user can review the parameters for the current project and click on cancel to change parameters or Continue to go ahead with the analysis. Once the analysis is started, a progress dialog will be shown.
