Import and export
Regions live in the browser's memory, one set per image (and per slice of a stack). They survive switching images, but not a page reload, so export or save them to keep them. Formats and rules are in GeoJSON import and export.
Export regions as GeoJSON
- Open the Region Editor.
- Click Download regions as geojson file.
- In Export Regions, keep or change the file name (default: the image name with
.geojson) and click Export.
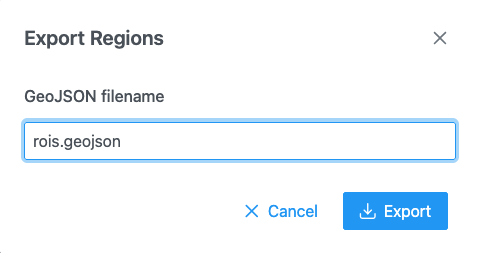
For a stack stored as one file, all slices are exported together, each feature carrying its slice number. For a stack that is a folder of files, one GeoJSON is written per slice.
Import a GeoJSON file
- Open the image the regions belong to.
- In the Region Editor, click Import regions and pick a
.geojsonor.jsonfile.
What you should see: a "Regions imported" message and the regions on the image, coloured by their class presets.
Importing replaces the current regions
Importing a single GeoJSON file replaces the regions on this image; it does not add to them. Export the current regions first if you want to keep them.
A feature without a classification gets the class Cell. Polygons, multi-polygons (with holes) and line strings are read; points are not supported.
Round-trip annotations with QuPath
SIV writes and reads the QuPath GeoJSON layout: each feature's properties.classification holds {name,
color}, and slices are recorded in geometry.plane.z.
From QuPath to SIV:
- In QuPath, select the annotations and use File → Export objects as GeoJSON (export as a FeatureCollection).
- In SIV, open the same image and click Import regions.
From SIV to QuPath:
- In SIV, export the regions as above.
- In QuPath, drag the
.geojsonfile onto the image.
Class names are kept; set up the same names as class presets so colours match. Feature ids and extra properties from the original file are preserved on export.
Import a folder of per-slice GeoJSON files
For a z-stack annotated slice by slice:
- In the Region Editor, click Import a folder of per-slice GeoJSON files.
- Pick the folder. Files are matched to slices in natural name order (
slice_2beforeslice_10).
If the folder holds a regionset.json, its class tree and display style are used.
Import a label volume
A label volume is a 3D image whose voxel values are class ids (NIfTI or NRRD).
- In the Region Editor, click Import regions.
- Select the
.nii,.nii.gzor.nrrdfile together with its ontology JSON (the class list), in one go.
SIV slices the volume, outlines each label on each slice, and names the classes from the ontology: an
Allen structure graph gives acronyms, a regionset.json gives its class tree. Without an ontology each
label becomes label <value>. The volume's slices must have the same size as the image; otherwise a
"Different size" message explains the mismatch.
Import from an OME-Zarr store or a zip
- OME-Zarr: use and pick the store's folder. SIV reads its first label image (NGFF 0.4 or 0.5).
- Zip: a
.zipof any of the above can be opened from a folder pick or from the server.
Import regions from the server
In an application with a server, click Import regions from server and pick a GeoJSON file, a folder of per-slice files or a label volume. Very large files load as a region source drawn tile by tile.
Save regions to the server
- Click Save regions to server.
- Keep or change the GeoJSON filename and confirm. If the file exists you are warned and asked to confirm the overwrite.
A folder stack saves one file per slice without asking for a name.
Export a mask image
For training a model or analysis in another tool:
- Click
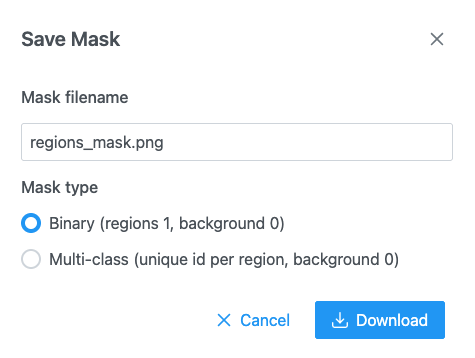
 Download mask of the regions as PNG.
- Choose the mask type:
- Binary (regions 1, background 0): region pixels are white (255), the rest black.
- Multi-class (unique id per region, background 0): each region gets its own value (1, 2, 3…). The PNG is 8-bit for up to 255 regions and 16-bit above.
- Click save. Progress shows "Rasterizing regions…" then "Encoding PNG…"; you can cancel.
The mask has the image's size. For images over 100 megapixels it is downscaled, and a "Mask downscaled" message gives the size used. Overlapping regions: later regions are painted over earlier ones.
Open annotations without an image
In the demo, Open annotations… in the header opens GeoJSON files, a label volume with its ontology or a
.zip on a blank canvas, to inspect them without the image (up to 8192 pixels per side).