Segment cells with AI
SIV can segment objects with AI models that run in your browser: nothing is sent to a server. In this tutorial you use Segment Anything (SAM) with box and point prompts to outline individual cells, then Cellpose to outline every cell in an area at once.
Time: about 15 minutes, plus model downloads the first time. You need: the live demo and a good connection. The first run of each model downloads it (14 MB for the default SAM model, about 588 MB for Cellpose); after that it is cached by the browser.
1. Segment with box prompts
- Open the sample img04.png (cells with blue nuclei and green cytoplasm).
- Press R and draw a rectangle loosely around one cell. Draw two more rectangles around two other cells.
- Click
 Segment with SAM (box prompt).
What you should see: a progress toast at the bottom right titled SAM. The first time it shows the model download, then "Encoding image…" and "Segmenting 1/3…". When it finishes it reports "Added 3 region(s)", and each rectangle has been replaced by the outline of the cell inside it.
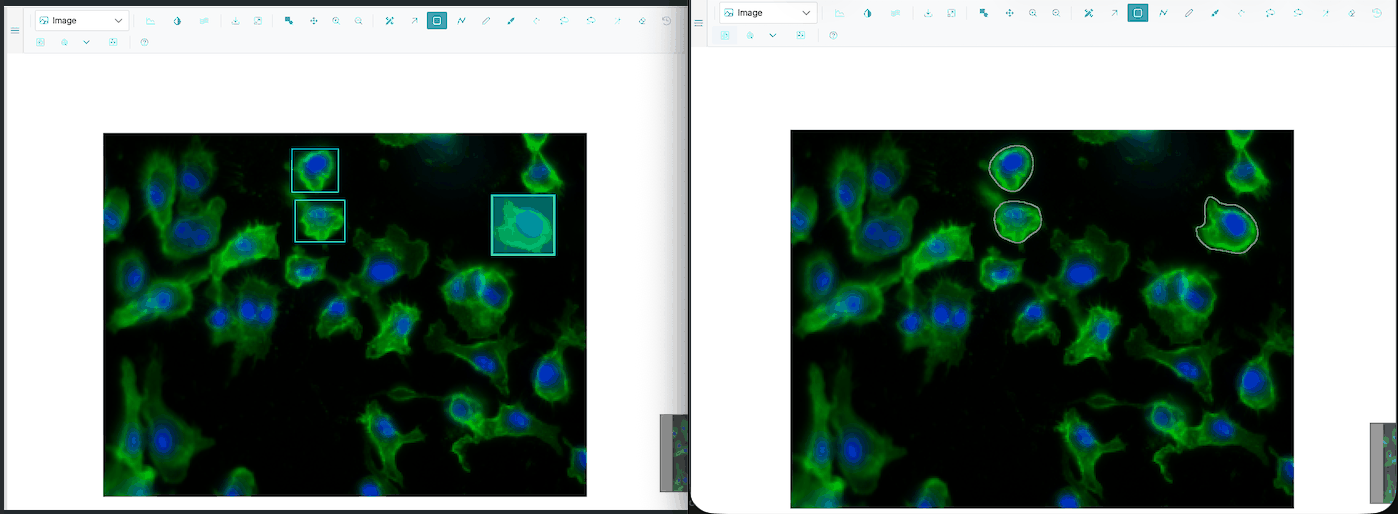
A rectangle that produced no mask is kept, so you can adjust it and click Segment again.
What SAM sees
SAM reads the image as it is displayed. Only the part of a rectangle that is on screen is segmented, and the contrast you set in Channels & Histogram affects the result. Zoom so the objects are comfortably visible before you segment.
2. Segment with point prompts
- Click
 SAM point prompts. The button stays
pressed while the tool is active.
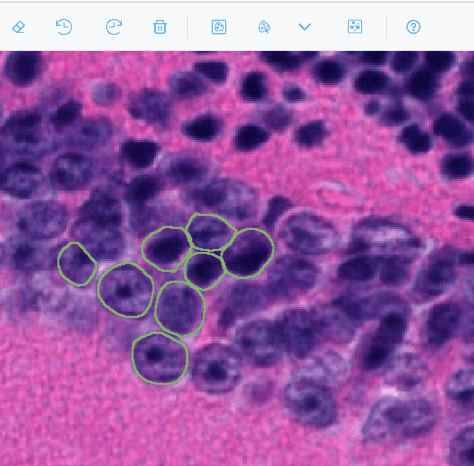
- Click in the middle of a cell that has no region yet.
What you should see: after a moment a new region outlines the cell.
- If the region includes too much, for example a neighbouring cell, hold Shift (or Alt) and click on the part that should be excluded. The outline is recomputed.
- Press Enter to keep the object. Press Esc instead to discard it.
- Click another cell: each plain click starts a new object.
- Click the point-prompt button again to turn the tool off.
3. Choose a model
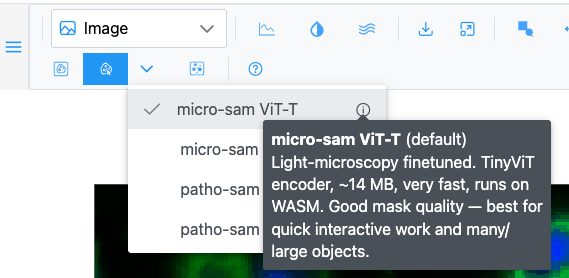
- Click the arrow next to the Segment button. The model menu lists the available SAM checkpoints; a check marks the active one.
- Hover the next to a model to read its size, speed and the images it was trained on.
| Model | Best for | Download |
|---|---|---|
| micro-sam ViT-T (default) | Light microscopy; small and fast | about 14 MB |
| micro-sam ViT-B | Light microscopy; highest accuracy | about 172 MB |
| patho-sam ViT-B | Histopathology (H&E and other stains) | about 180 MB |
| patho-sam ViT-B (int8) | Histopathology on slow connections | about 100 MB |
The choice applies to both the box and the point tool. For this tutorial keep micro-sam ViT-T.
4. Segment every cell in an area with Cellpose
- Open the sample 002_img.png.
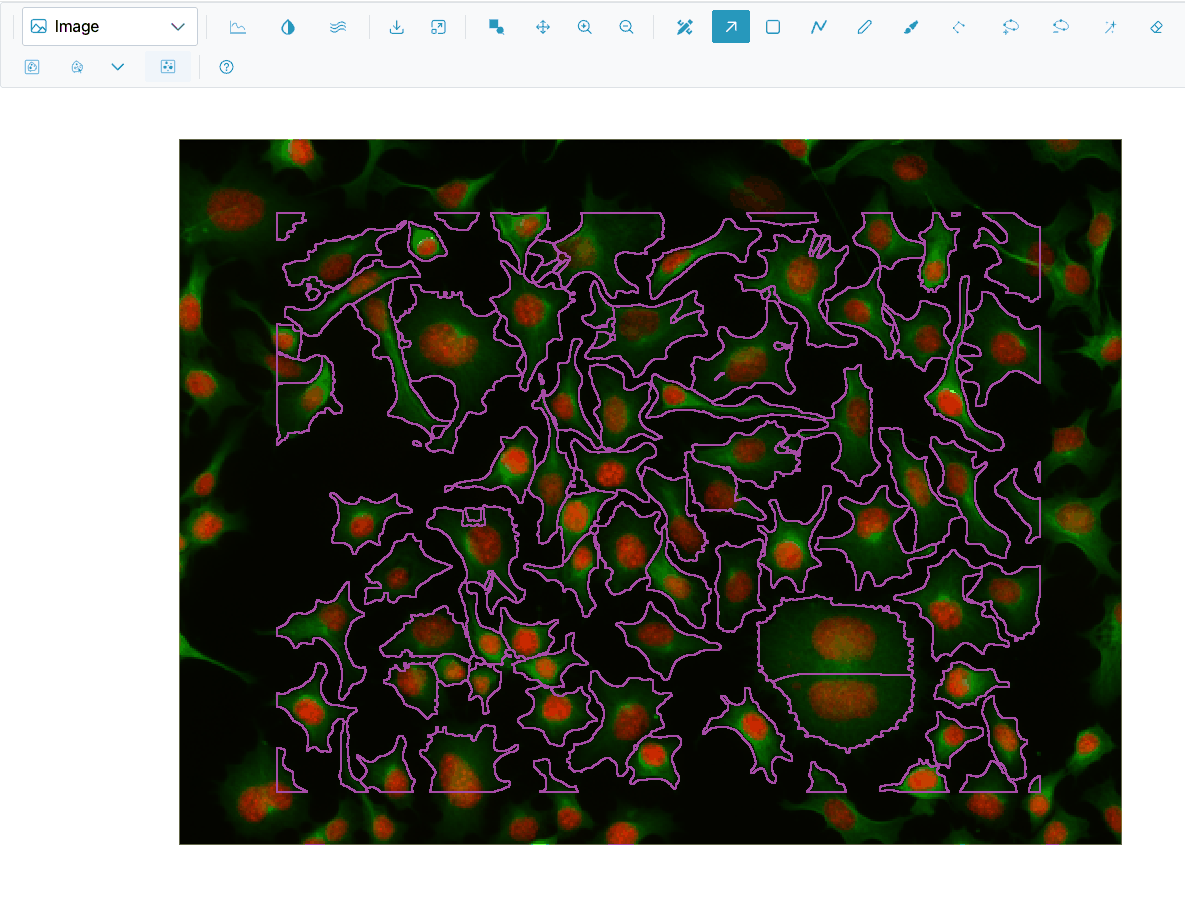
- Press R and draw one large rectangle over a group of 20 to 50 cells.
- Click
 Segment cells (cellpose-SAM).
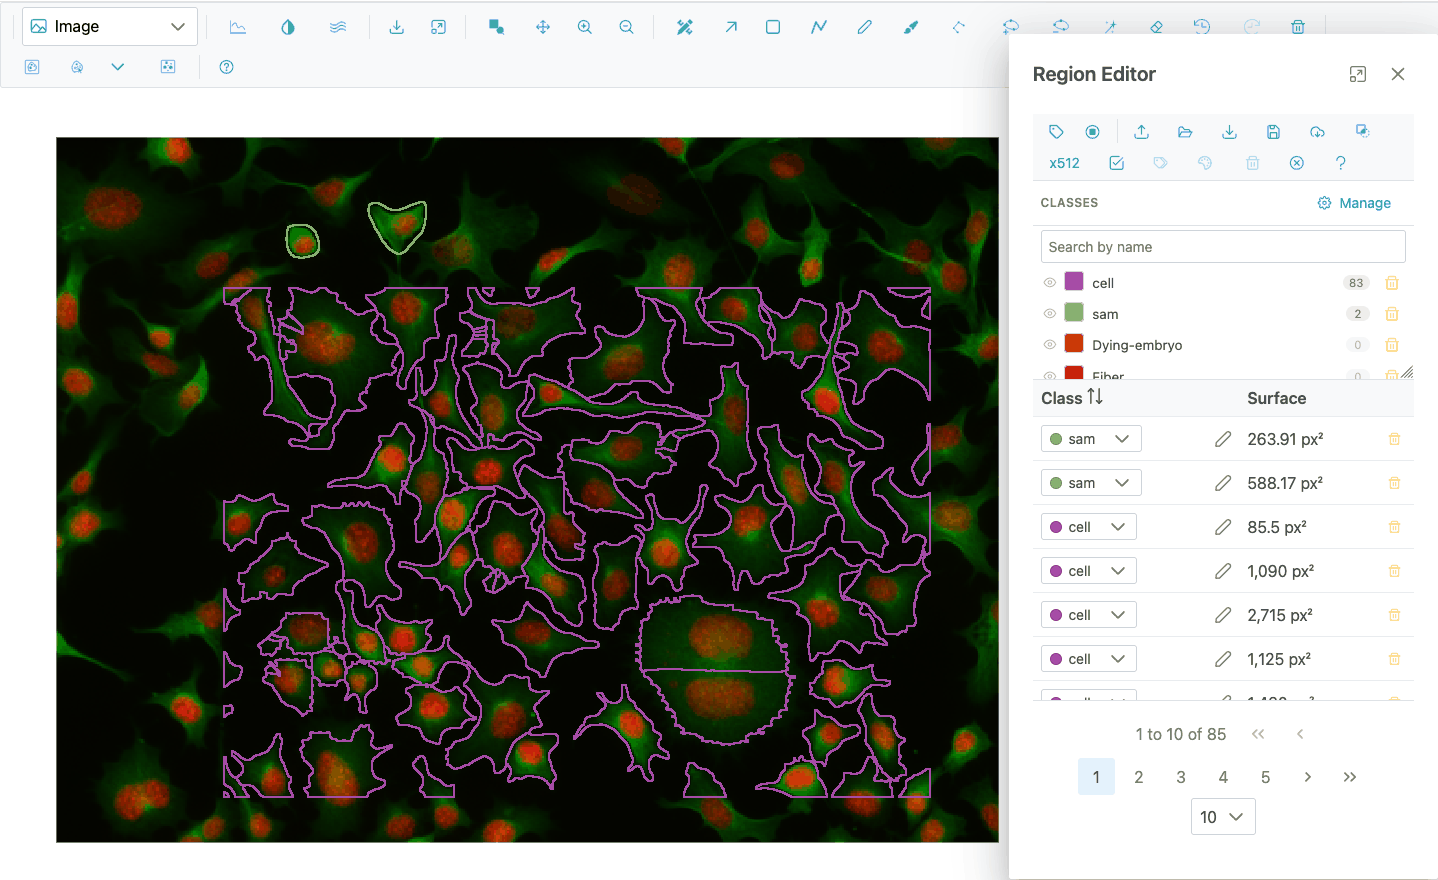
What you should see: a Cellpose toast showing "Downloading Cellpose-SAM model…" the first time, then "Running inference…", "Computing flow dynamics…" and "Tracing cells…". It ends with "Added N cell region(s)". The rectangle is replaced by one region per cell.
5. Review the results
- Open the Region Editor. Regions from SAM have the class sam and regions from Cellpose the class cell. Both classes appear in the Classes panel, each drawn in its class's colour.
- Delete wrong detections: select them and press Del (or D).
- Fix outlines with the vertex tools or the brush, as in Annotate your first image.
- Give the good ones a meaningful class with Edit class on selected rows.
Every segmentation run is a single step in the undo history, so Ctrl+Z removes everything it added.
What you learned
- Box prompts: draw rectangles, then Segment.
- Point prompts: click to add an object, Shift-click to exclude, Enter to keep, Esc to discard.
- How to pick a SAM model for your kind of images.
- Cellpose: draw a rectangle, get one region per cell.
Next
- AI segmentation how-tos: working with large images, slow connections and pre-caching models.
- AI segmentation reference for every option and message.